


If you think others need to see this, share it on one of the sites below by clicking on the button.
![]()
![]()
![]()
![]()
![]()
![]()
I’ll be honest with you: I remember first learning about Bloom’s Taxonomy when I was getting my teaching credential but I never really thought it was that big of a deal. I had a decent understanding of what it was and how you could implement it. What I didn’t get was why it mattered.
As we transition to the Common Core State Standards where Webb’s Depth of Knowledge (DOK) is the taxonomy of choice, the sentiment remained: why does depth of knowledge matter? I recently had an eye-opening experience that has helped me realize that depth of knowledge is more critical than I ever realized and I want to share that experience with you so you can understand what we should be working towards.
I was working with a strong and motivated team of seventh grade math teachers in my school district. We were in the process of creating an assessment to measure students’ understanding of CCSS 7.G.4 which states, “Know the formulas for the area and circumference of a circle and use them to solve problems; give an informal derivation of the relationship between the circumference and area of a circle.”
Area and circumference of circles was previously a 6th grade standard in California. On the outgoing California Standards Test (CST), this standard was assessed using questions like the ones below from the released test questions. All of the released test questions for this topic were DOK 1.
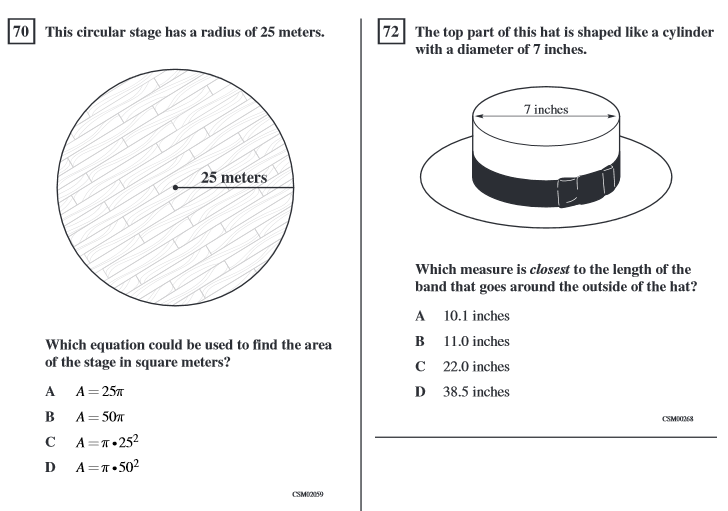
Accordingly, we decided to include two DOK 1 questions like these in the assessment.
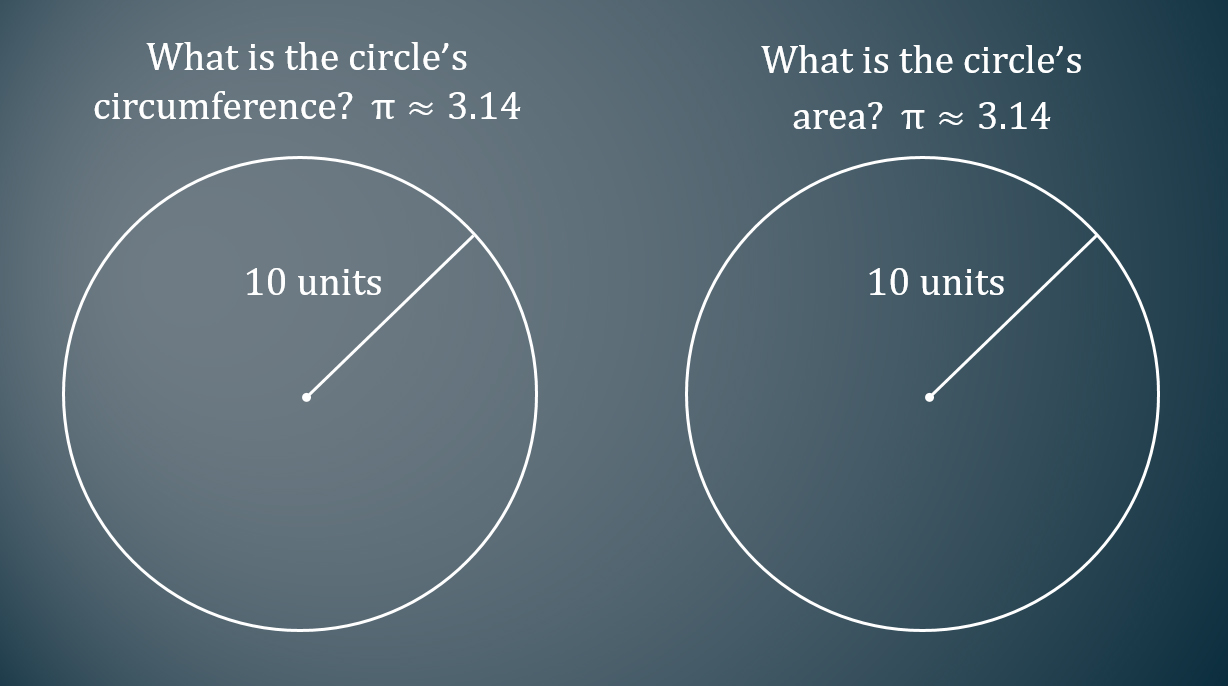
Most students answered these two DOK 1 questions correctly. Here are ten students who exemplify the process many of their peers used.
- 68.26% correctly answered the circumference question
- 78.59% correctly answered the area question
In years past, that would have been the extent of the assessment. However, we wanted to know the depth of knowledge that students would be expected to demonstrate under the Common Core State Standards. To determine this, and since California is a member of the Smarter Balanced Assessment Consortium (SBAC), we looked at the SBAC Preliminary Test Blueprint which lists the DOK levels that students will be assessed at. As you can see below, it shows that the cluster this standard is a part of will be assessed at DOK 1 and/or 2.

However, after seeing the SBAC Preliminary Test Blueprint we wondered, “What does a DOK 2 question for this standard look like and where would we find one?” We couldn’t find one online or in our textbook so we spent about 15 minutes thinking of ideas, and eventually came up with this question below:
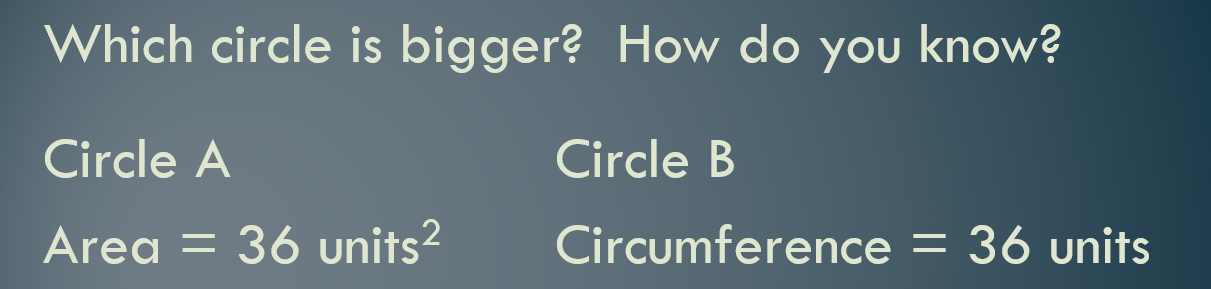
It honestly didn’t seem that impressive or that big of a difference to us. We weren’t even sure if it really reached the DOK 2 level. Ultimately we decided to include it on the assessment. We graded this question by hand using the two-point SBAC rubric for evaluating constructed response questions which states:
- For full credit (2 points):
- Student reaches the correct conclusion AND student provides sufficient reasoning to support this conclusion.
- For partial credit (1 point):
- Student reaches the correct conclusion but does not provide sufficient reasoning to support this conclusion OR
- Student does not reach the correct conclusion but provides reasoning to support this conclusion that contains a minor conceptual or computation error.
Here are the same ten students answering the DOK 2 question:
Of the ten students, only one earned two points. Six earned one point and the remaining three earned zero points. As a comparison, of the 396 seventh grade students assessed only 12.12% earned two points on the DOK 2 question.
We were shocked. We thought that there might be a difference in results between the two types of questions but we didn’t think it would be this dramatic.
Some interesting additional facts:
-
97.92% of the students who correctly answered the DOK 2 question also correctly answered both of the two DOK 1 questions. So, correctly answering the DOK 2 question was a strong predictor of students’ ability to answer both of the DOK 1 questions correctly.
-
10.61% of the students who correctly answered both of the two DOK 1 questions also correctly answered the DOK 2 question. So, correctly answering both of the DOK 1 questions did not mean students would be able to answer the DOK 2 question.
- 28.28% of the students earned only one point. All of them earned one point by choosing Circle B and providing insufficient reasoning. Among the most common explanations determined to have insufficient reasoning were:
- “Area is always bigger than circumference”
- “Area is everything inside the circle and circumference is everything outside the circle. There is always more space outside of a circle.”
- 59.59% of the students earned no points meaning they picked circle A and had insufficient reasoning.
Here were our takeaways:
- We have had a false belief that students were proficient with this standard because we assessed them with questions that measured shallow depths of knowledge.
- We don’t know exactly why students got the DOK 2 problem wrong and it requires more investigation. Did they get the DOK 2 problem wrong because:
- the DOK 1 problems asked students to plug in the radius and go forward while the DOK 2 problem asked them to work backwards to find the radius?
- the DOK 1 problems told students exactly what action to take (i.e., find the area or circumference) while the DOK 2 problem did not give specific instructions and students had to figure out how to connect the two circles?
- It isn’t fair to assess students at higher DOK levels when we haven’t incorporated them into our instruction. Hence, we better incorporate them into our instruction.
- Finding DOK 2 and DOK 3 questions can be really challenging. Hence, my real life colleague, Nanette Johnson, and I created a website called Open Middle (based on inspiration from a Dan Meyer presentation) where we have a growing number of higher DOK problems. Check it out and you will find a variety of problems you can immediately use.
What other takeaways do you have that we missed?

 As with most art, constraints improve the output: limit the number of words that students can use in a row, or set a minimum or maximum number of words.
 During our study of world religions, I wanted to ensure students thoughtfully read an article about the Dalai Lama. To get them talking and processing, I spaced
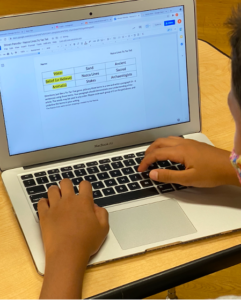
 Ask students to read an article or watch a video that has two perspectives; we watched the